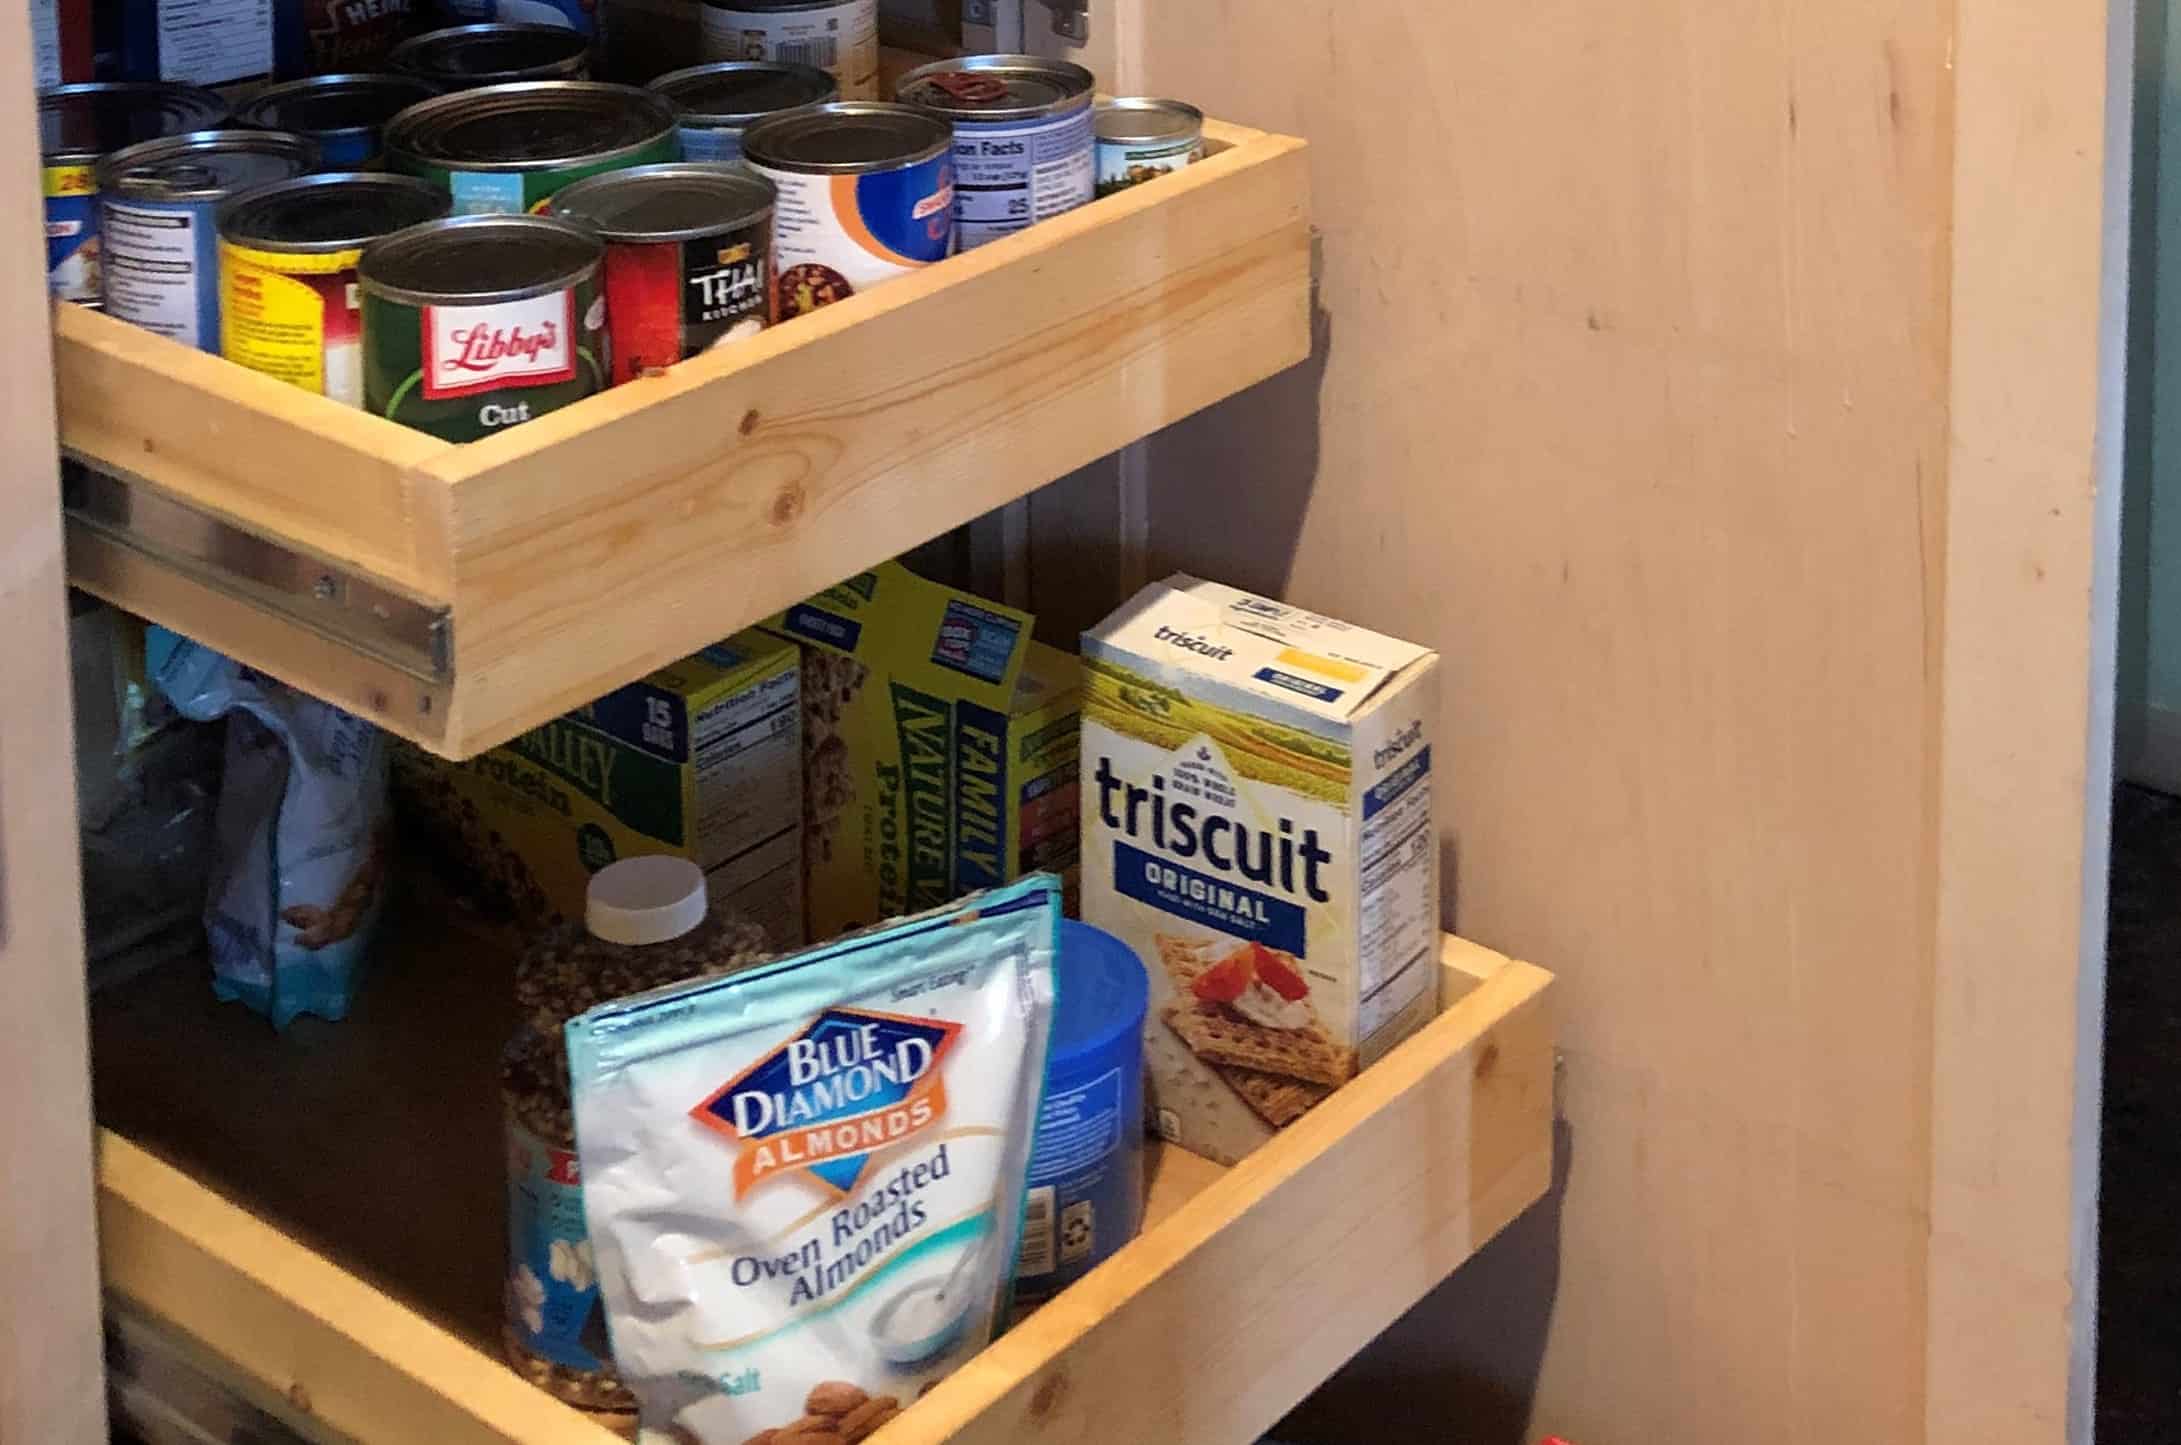
DIY pull out shelves changed my life. I am only slightly exaggerating here. But seriously, we decided to transform our cabinets in the kitchen and bathroom with DIY pull out shelves. The result has been nothing short of amazing.
When we moved into our home five years ago, the kitchen pantry had no shelving. So, we built our own pull out shelves. In our deep cabinets, the new full-extension pull-out shelves allow my family to reach the back of cabinets with ease.
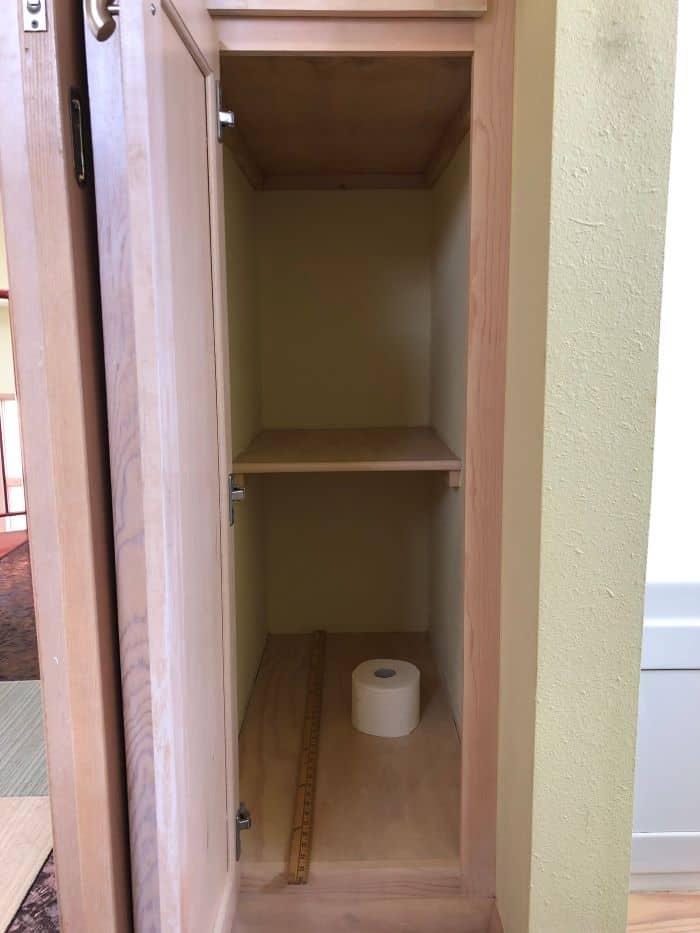
The do-it-yourself DIY pull out shelves also make the narrow openings easier to navigate. The shelves now pull ALL THE WAY OUT to bring order to overly deep spaces – like our bathroom cabinets. After years of stretching through the 12-inch opening to reach items at the back, we decided it was time to build pull out shelves.
It was one of the smartest DIY projects we ever did. The following steps walk you through the process of building your own DIY pull out shelves.
Getting Started on Your Pull-Out Shelves
What exactly are DIY pull out shelves? Well, the shelves of a typical kitchen cabinet just sit there. But DIY pull-out shelves are basically like drawers. The drawers slide out toward you so you can easily reach what’s in the back.
Each drawer slides on heavy duty rails connected to the walls of the cabinet using wooden spacers. The spacers ensure the finished drawers fit through the opening of the cabinet, including any protruding hinges. The basic steps to building and installing shelves include:
- Taking measurements
- Installing spacers and drawer slides inside the cabinet
- Assembling the drawer boxes for your pull-out shelves
- Installing the finished drawer boxes
You will need the following tools and materials to construct your pull-out shelves. Note that the lengths of materials are not given. These are specific to each project and will be determined in Step 1 below.
The materials and tools listed below are available at hardware stores, home centers, lumber yards and online. For your convenience, we have included some links to the products on Amazon. Home Garden and Homestead receives a small commission from sales generated by our links. We thank you for supporting this website!
Materials:
1” x 4” whitewood boards
¼” birch plywood
Wood for spacers (size varies by project)

Tools:
Saw
Table saw or router with groove bit
Sandpaper
Clamps (optional)
Select sturdy drawer slides. There are two main types: roller slides (which extend only three-quarters of their length) and ball-bearing slides (which extend fully). Ball-bearing slides tend to support heavier items and roll more smoothly.
Note: Home Garden and Homestead participates in the Amazon Associates Program. We receive a small commission from qualifying sales generated by the links in our stories. Thank you for supporting this website!
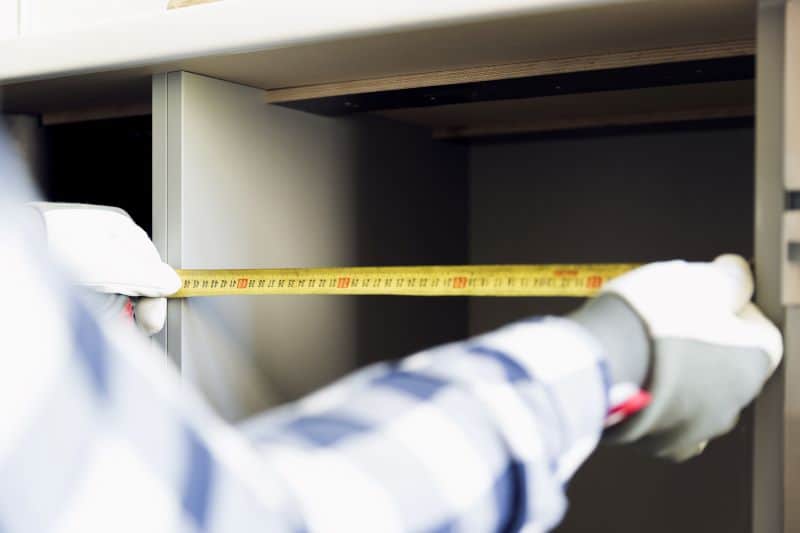
Step 1. Taking Measurements
All good projects start with a few important measurements. Grab a piece of paper and a pencil, and let’s get started. I like to follow the old adage – measure twice, cut once.
- Drawer slide and shelf lengths. Measure the depth of your cabinet to determine the length of each finished drawer. Next determine the length of drawer slides required. You will need to purchase the drawer slides to determine the remaining measurements.
- Spacer thickness. The cabinet opening will determine the width of your pull-out shelves as well as the thickness of spacers required to support each shelf. To determine how thick the spacers need to be, lay the drawer slides in place. Then, extend them through the cabinet opening. Consider any protruding hinges that you will need to work around. Now, measure the distance between the cabinet walls and the back of the drawer slide. This is the thickness of your spacers.
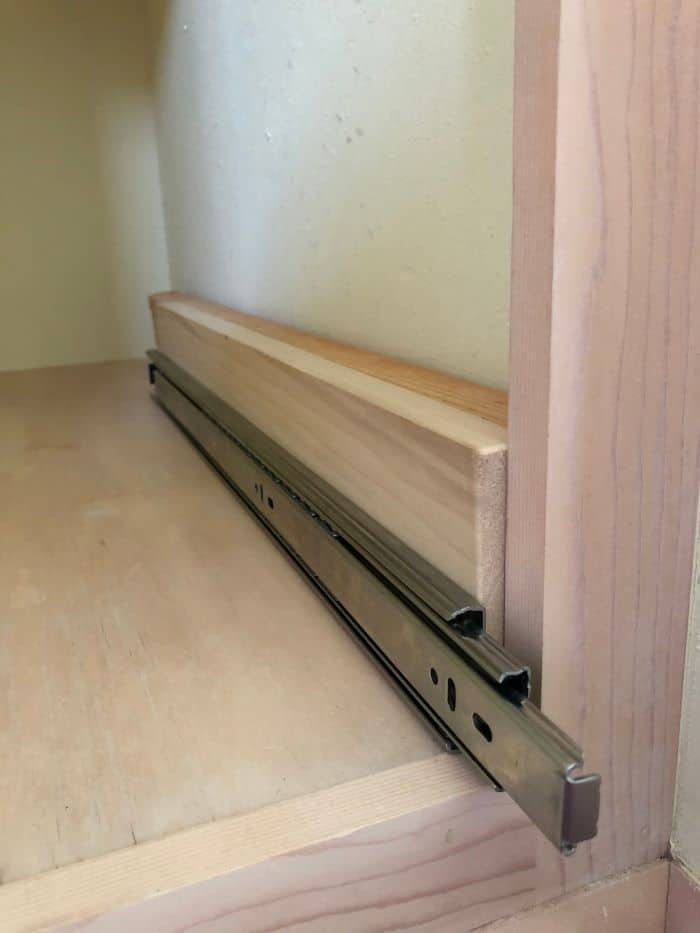
Many modern cabinets are frameless and may not require the use of spacers. In this case, the drawer slides are attached directly to the cabinet wall. Other cabinets have a very wide face frame, requiring thick spacers. Thicker spacers may require using more than one piece of wood. I like to use pieces of scrap wood to mock-up the spacers. We used 2” x 4” boards and 1” x 4” boards to build our spacers. We also needed shims on the hinge side of the cabinet.
- Drawer width. The drawer width is the distance between the inside of the drawer slides. Be careful not to overestimate the drawer size. It is easier to add shims behind your drawer slides than to shave down oversized drawers.
Step 2. Install Spacers and Drawer Slides Inside the Cabinet
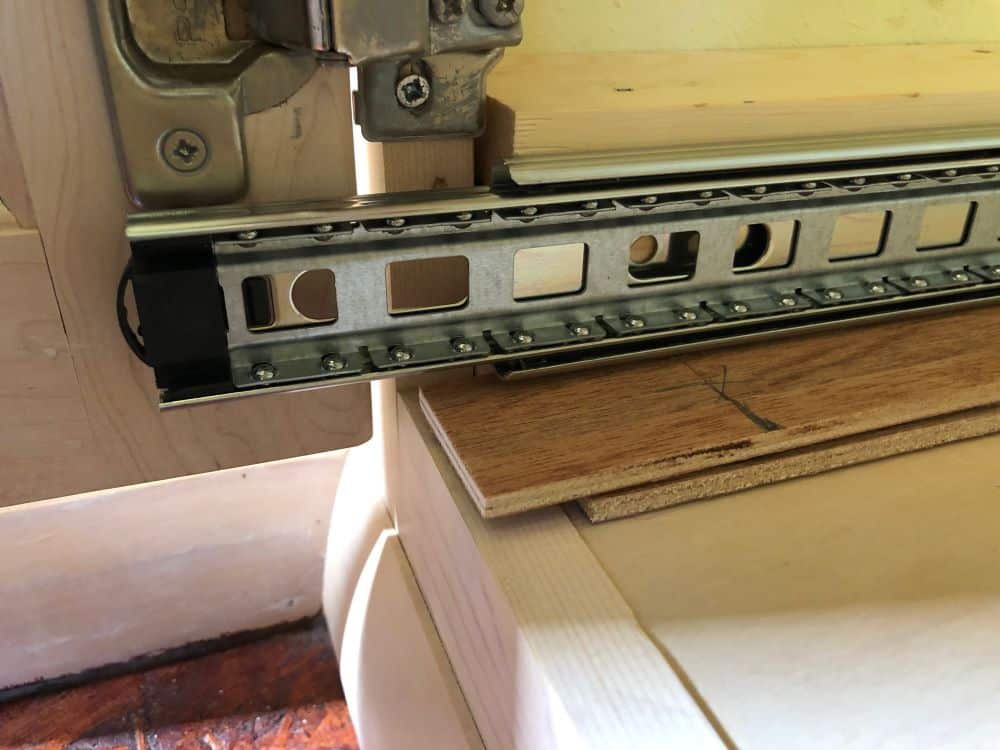
As you install spacer boards inside the cabinets, don’t forget to take into account the door hinges. In many cases, you can adjust your shelf locations vertically to avoid interfering with hinges. Or you may need an additional spacer to allow the shelves to extend past hinges.
- Cut spacer boards. Spacer boards should run the full length of the interior cabinet wall. Cut each piece to the appropriate length.
- Stain the Boards. If you are planning to stain the drawers and spacers to match your cabinets, it is easiest to do so before installation. Our cabinets have a very pale whitewash finish, so we left our wood unpainted.
- Install spacers. Apply wood glue to the backs of spacer boards (the side facing the cabinet wall) to provide additional support. Secure boards in place using screws. If you are securing the spacers into sheet rock, it is best to screw the spacers into the studs. Use a stud finder to locate studs.
- Use shims as needed. Cabinet interiors are not always square. You may need shims behind spacers in some places.
- Install drawer slides. Follow package directions to attach the drawer slides to the spacer rails. Make sure the bottom drawer slides are not too close to the floor of the cabinet. We used scraps of plywood when aligning the bottom slide to ensure plenty of clearance for the finished drawer.
Optional: Cap Spacers. Our bathroom cabinet required multiple spacer boards. To create a more finished look, we capped spacers with a 1” x 4” whitewood board cut to fit snuggly over the spacers.
Step 3: Build the Drawer Boxes for Your DIY Pull-Out Shelves
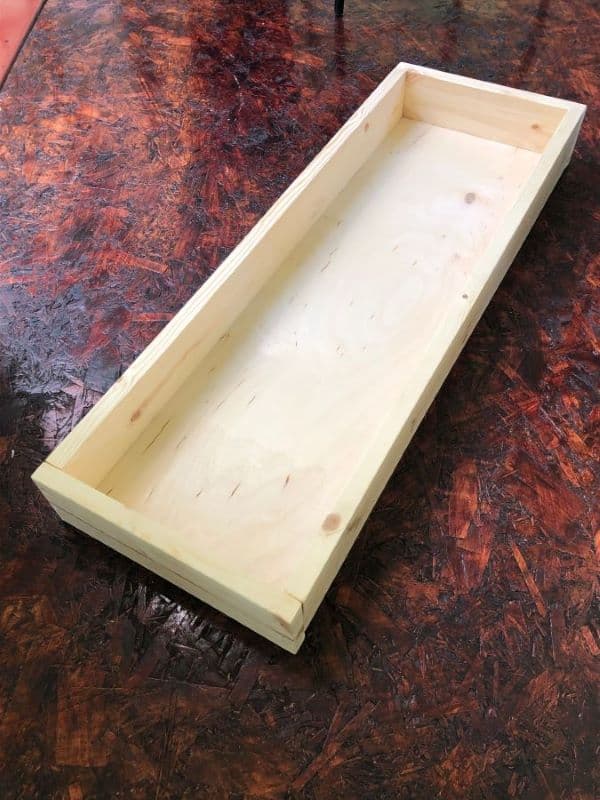
The pull-out shelves are designed like drawers with a wooden frame to keep stored items in place. We used 1” x 4” whitewood boards to build the drawer frame and ¼” birch plywood for the drawer bottom.
- Cut 1” x 4” boards to proper length. The measurements taken in Step 1 above tell you the overall dimensions of your drawer box. It is a good idea to double check the drawer width once the spacers and drawer slides are installed. Use the overall dimensions to determine the length of each frame piece.
- The end pieces (front and back) will extend the full width of the drawer box to hide the joints of the side pieces. These end pieces will be equal to the overall drawer width measured above.
- The length of the side pieces equals the overall length of the drawer minus the thickness of the front and back pieces. We used 1” x 4” boards to build the frame. Note that 1 x 4’s actually measure ¾ inch thick, not a full inch. Therefore, the length of each side piece is calculated as:
Side length = overall length – 1 ½ inches (the thickness of both end pieces).
- Cut a channel for the drawer bottom. The plywood drawer bottom is set into grooves in the frame for added support. Using a table saw or router, cut a channel into the frame boards about ¼” deep and wide enough to accommodate the plywood bottom. Depending on the tools you are using, it may be easier to do this before cutting the boards to their proper length.
- Cut the drawer bottom. The plywood bottom of the drawer needs to be cut wide enough to fit into the grooves of the frame. As such, the dimensions of the drawer bottom are one-inch shorter and narrower than the overall drawer dimensions.
- Sand pieces and test assembly. Sand all of the pieces smooth. Before moving on to the next step, assemble the pieces to make sure they fit together properly. Make additional cuts as needed.
Step 4: Assemble the Drawer Boxes for Your DIY Pull-Out Shelves
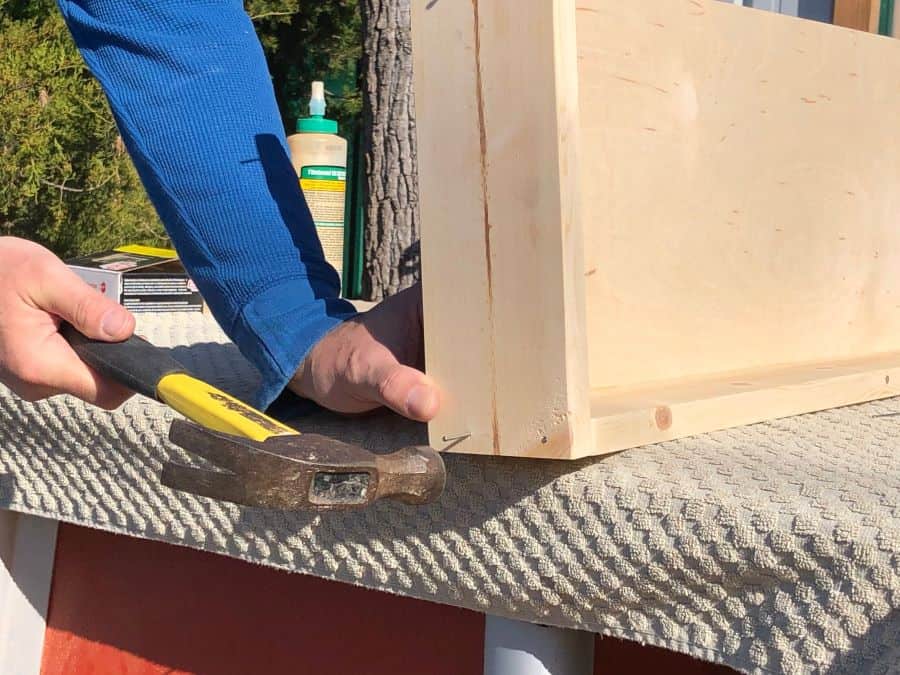
- Assemble the pieces. Apply a thin bead of wood glue inside the groove of each frame piece. Insert the plywood drawer bottom into the groove and assemble the frame. Use finishing nails to secure the end pieces to the side boards. You may wish to use clamps to hold the pieces together until the glue dries.
- Finish the drawers. After the glue has dried, use a finishing nail tap (sometimes called a finishing nail setter) to drive the finishing nails into the wood. Then cover the nail with wood filler. Stain the drawers as desired to match your cabinetry.
Step 5. Install Your DIY Pull Out Shelves
You are almost finished. All that remains is installing the drawer slides to your drawer box and setting it in place. Follow the instructions that came with the drawer slides to complete the installation.
By building your own DIY pull out shelves, you can customize cabinets to meet your specific needs. The pull-out shelves maximize storage space and provide easier access to items at the back of the drawers.

Thank you! I am currently planning a project this weekend. I saw this just in time. Thanks again.